Got so much embroidery clutter that you can’t take care of it? We have answered how to store embroidery floss in this guide. Embroidery floss is something that never seems enough and always catches up to you one day when you cannot find ample space to store another color.
Every different design requires a separate collection. This ultimately leads to a massive pile of thread that is absurdly hard to detangle and organize.
We will tell you how to store embroidery floss eliminating the daily hassle of sorting out a tangled mess and dive right into the process.
3 Different Ways to Store Embroidery Floss in 2023
You can segregate embroidery floss according to your current project using various ways. Some of the most suitable methods include:
- Drawers and Cabinets
- Bobbin Boxes or Plastic Storage Bin
- Binders and Bags
Drawers and Cabinets:
Embroidery floss can effectively be stored in drawers or cabinets. You can separate threads using transparent drawers based on their color compatibility. This is will result in an easy eye location regarding the floss.
The drawers can be hung on a wall or be kept in a cupboard with the rest of your embroidery tools. You can label the drawers if they are wooden in order to effortlessly find whatever color you might be looking for.
One thing to keep in mind as you look for a suitable drawer or cabinet is to make sure it is big enough that the skeins can fit without folding.
Bobbin Boxes:
You can use bobbin boxes or simple plastic storage bins to store embroidery floss. These storage boxes are readily available in markets and stores. Separate cabins made inside that box make it easy to set apart different colored threads.
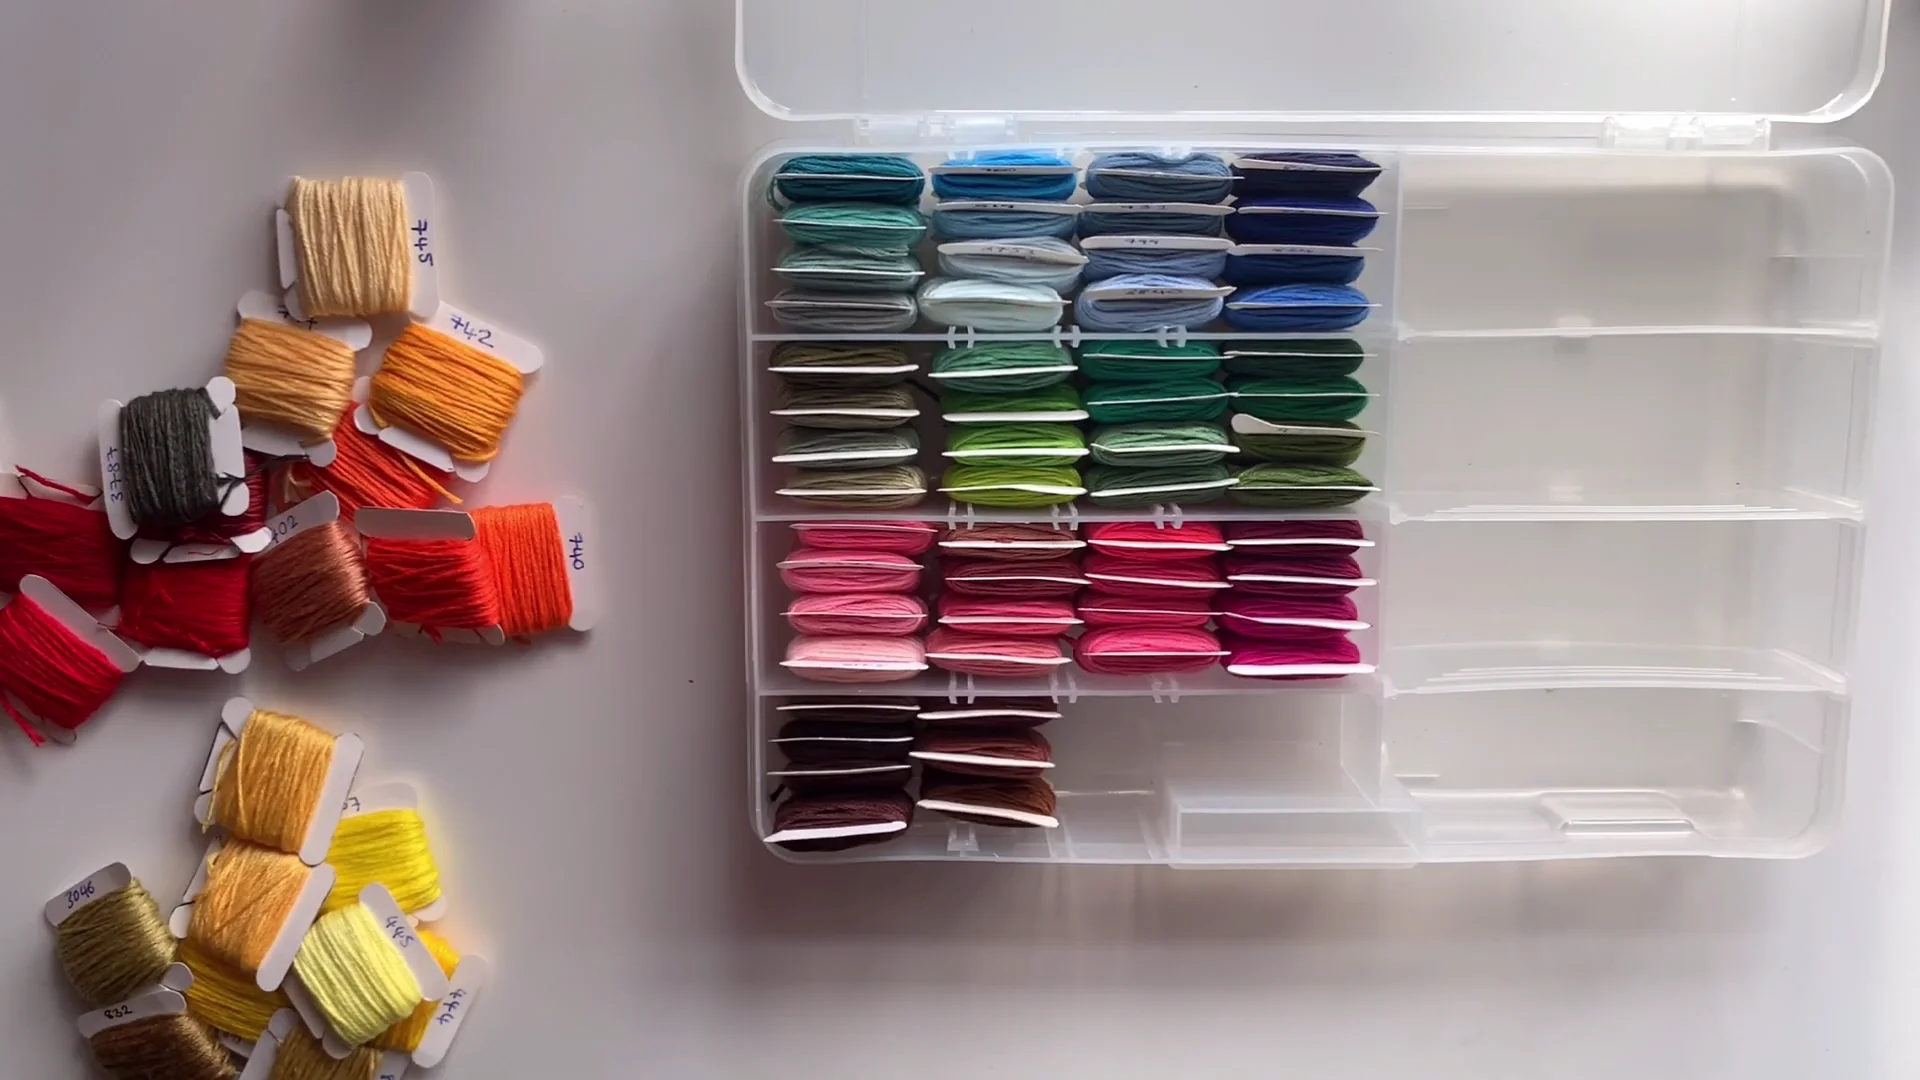
Bobbin boxes give you the advantage of adding new embroidery floss without having to rearrange the whole bin again. Threads of one project can be out side by side to make it simple.
Plastic storage bins are usually inexpensive making them uncomplicated for any embroiderer.
Binders and Bags:
Binders and Bags are incredible tools adding to how to store embroidery floss. This is useful for those of you who find it hard to sit and embroider at a specific spot at your house. If you like to travel with your embroidery kits, floss can also be stored for effective use in binders.
Loop your embroidery floss through the acrylic organizer bars attached to the binder to use it the right way. Set it up and grab the thread you want to use for your project. However, If you are creative then Best Embroidery Machines For Custom Design can be helpful in making wonderful embroidery designs.
Another quick and easy way to store your threads is by using bags. They are simple to handle and you can find this in any nearby store. One color of floss can be kept in one bag and the others in separate ones to organize by colors. Bags do not take much space either and that is always a plus.
How to Organize Embroidery Floss without Bobbins?
Bobbins are an effective way to store embroidery floss but it can be a chore in itself sometimes. You can organize your embroidery floss without bobbins as well. The most functional way to arrange and sort out your threads without bobbins includes the use of:
- 4×6 photo boxes
- DMC color card
Your embroidery floss can be kept safe, clean, and organized by following some simple steps.
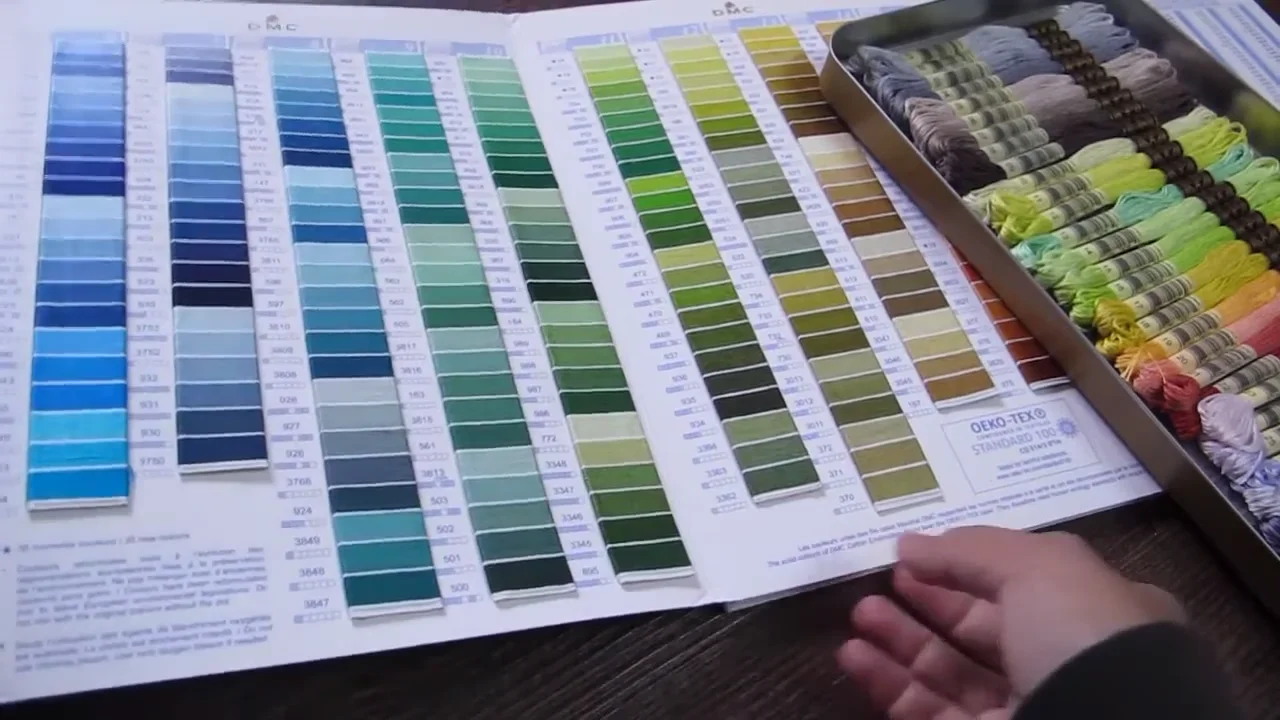
If you do not own a DMC color card, we suggest you get one immediately. It helps with the organization of your embroidery floss. In addition to that, the color card can prove to be useful in creating color conversions.
Instead of printing one out yourself, getting a real one is more suitable to get an accurate color depiction. The DMC color card consists of 20 color groups in which 489 solid flosses can be organized. You can get a rainbow container or a clear one and label it with color tags. However, If you want to embroider on hats then Best Embroidery Machine For Hats will be helpful.
The visual appeal is enough to convince you into following this method while storing embroidery floss. The use of photo boxes extends as it does not bend or deform the thread in any way. 4×6 cases are perfect to fit in the floss inside.
How to Store Embroidery Floss on Clothespins?
You can store embroidery floss using the different ideas listed above. One way can also be through the use of clothespins. To avoid untangling thread every time you start a new project, try this simple solution.
Things You Need:
- Embroidery floss
- Clothespins
Step by Step Instructions:
Follow these simple steps to achieve an untroubled embroidery routine:
- Open the clothespin and place the end of the embroidery floss you want to use between the large and small holes.
- Clamp the clothespin shut.
- Wrap the thread around the pin between the hinge and the large hole completing the whole floss.
- Pull the end of the floss into the mouth of the pin to secure it firmly.
You can color the clothespin in the color of the thread or put tags on it for effective floss storage. Moreover, If you are interested in running embroidery business then read How to Start an Embroidery Business as a Beginner.
Frequently Asked Questions – FAQs
How to store embroidery projects?
The embroidery projects that you make should be stored where the fabric can breathe. Air-tight plastic boxes should be avoided. It can result in the build-up of mold and dirt. Airflow is necessary for your embroidery projects.
How to build a cross stitch floss organizer?
Cross stitch floss can be organized and stored in plastic bags. The threads can be segregated through sealable bags to avoid the hassle. You can label the bags in the color of your thread or the cross-stitch floss. The bags can easily be carried as well.
How to make an embroidery floss organizer DIY?
You can simply make an embroidery floss organizer using a clothespin by wrapping the thread around it. DMC color cards and photo boxes can be used as well to isolate different color flosses. Create labels for boxes as well as cards to make it easy.
Conclusion:
Embroidery floss is something that adds up as your passion grows. Buy as many colors as you want but don’t forget to store them properly. Be sure to not rest your floss under the sun to avoid faded colors. Pick a method that works for you and store it away!
Leave a Reply