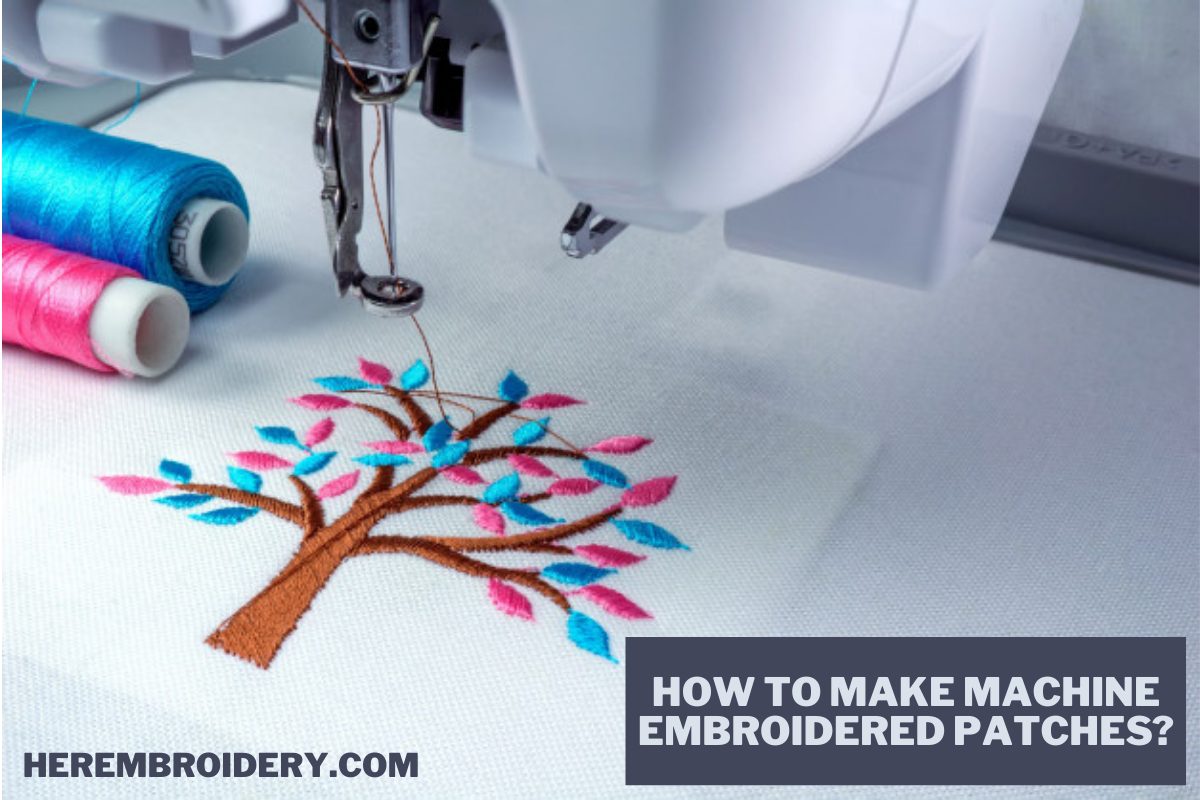
Embroidery patches are one of the most useful and beautiful products you can make using an embroidery machine. Many beautiful embroidery designs, brand names, logos, and themes can be created as embroidery patches.
These embroidery patches can be easily stitched and sticked on various products like bags, pockets, pants many textile products. However, if you want to make hats then Best Embroidery Machine For Hats can help you in making stylish hats. You can also get knowledge of embroidery on Her Embroidery.
Because of their uncountable benefits, there is a widely asked question:
How to Make Machine Embroidered Patches?
1. What do you need to make Machine Embroidered patches?
- Fabric: it is important to choose a quality fabric as a base that does not stretch or distort while embroidering. Wool, denim, nylon, and twill are all good choices.
- Embroidery Software: embroidery software will help you convert your design into stitches
- Design Digitizer: since you are asked to make an embroidery patch of a specific design or logo, you will need a digitizer to convert the design into a digital format in line with your machine.
- Water Soluble Stabilizer and an Iron-on Adhesive
2. Prepare a Design File
If you are provided with the specific design by the customers to be turned into patches, you need a USB or any external memory device or hardware to upload the design into your embroidery machine. If this is not the case, you can create your own design using vector drawing programs like Illustrator, Inkscape, Drawpad, Adobe Vector, and design Evo.
After creating a vector drawing of your design, you need to scale it at this stage. You can also scale the design after using a switch convert software, as it becomes more difficult and complicated at later stages.
A design digitizer will then convert the design into a digital format that is compatible with your embroidery machine. At this stage, you will also decide the final shape and size of the patch.
3. Turn The design Into Stitches
An embroidery software will help you convert the design into stitches. There are many embroidery software available, e.g., DRAWings, Futura Photostitch, Buzzword 2, etc.
This software will allow you to edit the design at this stage; for example, you can choose the tich filling, pattern, and type of underlay stitching. At this stage, you can choose and change colors, add and merge more colors and add the final trim command.
4. Hoop The Stabilizer and Fabric
This is the first practical step in the whole process. In this step, you need to cut the piece of fabric of the appropriate size. There are few considerations regarding the size you should make before cutting a piece of fabric.
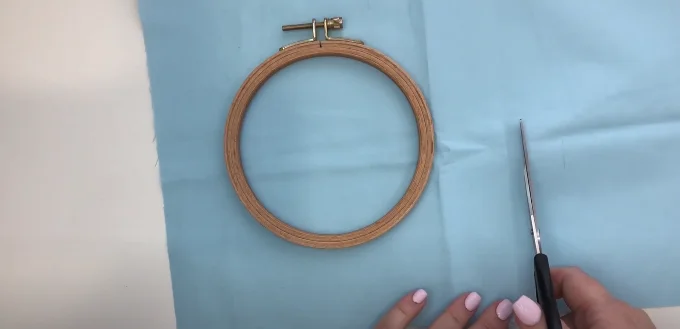
it is necessary to cut a piece of fabric and choose a hoop with at least 1-inch larger in dimensions than the original design dimensions. Remember that irregular shapes like logos, butterflies, and flowers need more breathing room than regular shapes like circles, squares, and triangles.
Moreover, your fabric piece should be large enough that easily waves out of the hoop so that you can easily grab and adjust it. After getting a perfect fabric size, you need to cut the stabilizer piece of the same size as your fabric.
Carefully stick both pieces so that you get a smooth surface. Hoop the stabilized fabrics and make sure there are no creases and wrinkles on the surface.
5. Begin to Stitch
Once you hoop the piece of fabric and stabilizer, you are ready to go. Attach the hoop to the machine’s stitching or embroidery arm. Then thread the machine using various colors, as per the requirement of the design.
You need to thread the bobbin as well. You may also need to occasionally change the thread colors if you do not use a multi-needle embroidery machine. You can also use Best Embroidery Sewing Machines Combo in order to space space and money.
6. Final Processing
Once the stitching process is complete, you will de-attach the hoop from the machine’s embroidery arm and then unhoop the piece of fabric. It is recommended to trim the piece roughly, leaving a considerable fabric around the borders. That part is removed with more care in the finishing process, leaving the fine and details border behind.
Remove the water-soluble stabilizer by running it under hot water. It is recommended to remove the stabilizer, according to the guidelines provided by the manufacturer.
If you want to use an Iron-on backing, wait until the patch is completely dried. Fuse the Iron-On backing as per instructions provided by the manufacturer.
Keep in mind that these are the general guidelines on how to make machine embroidered patches. You may need to learn extra things, depending upon which software and type of embroidery machine you are using to create the embroidered patches.